
A running toilet can cost you on your water bill, and a low pressure flush can cause clogs and other issues. Keeping your commode in good working order will save you money and keep the plumbing flowing in the right direction. Here are a few simple toilet maintenance tasks you can do yourself so you save money on any future repair bills, too. All you need are some diagonal cutters, pliers, and rubber gloves.
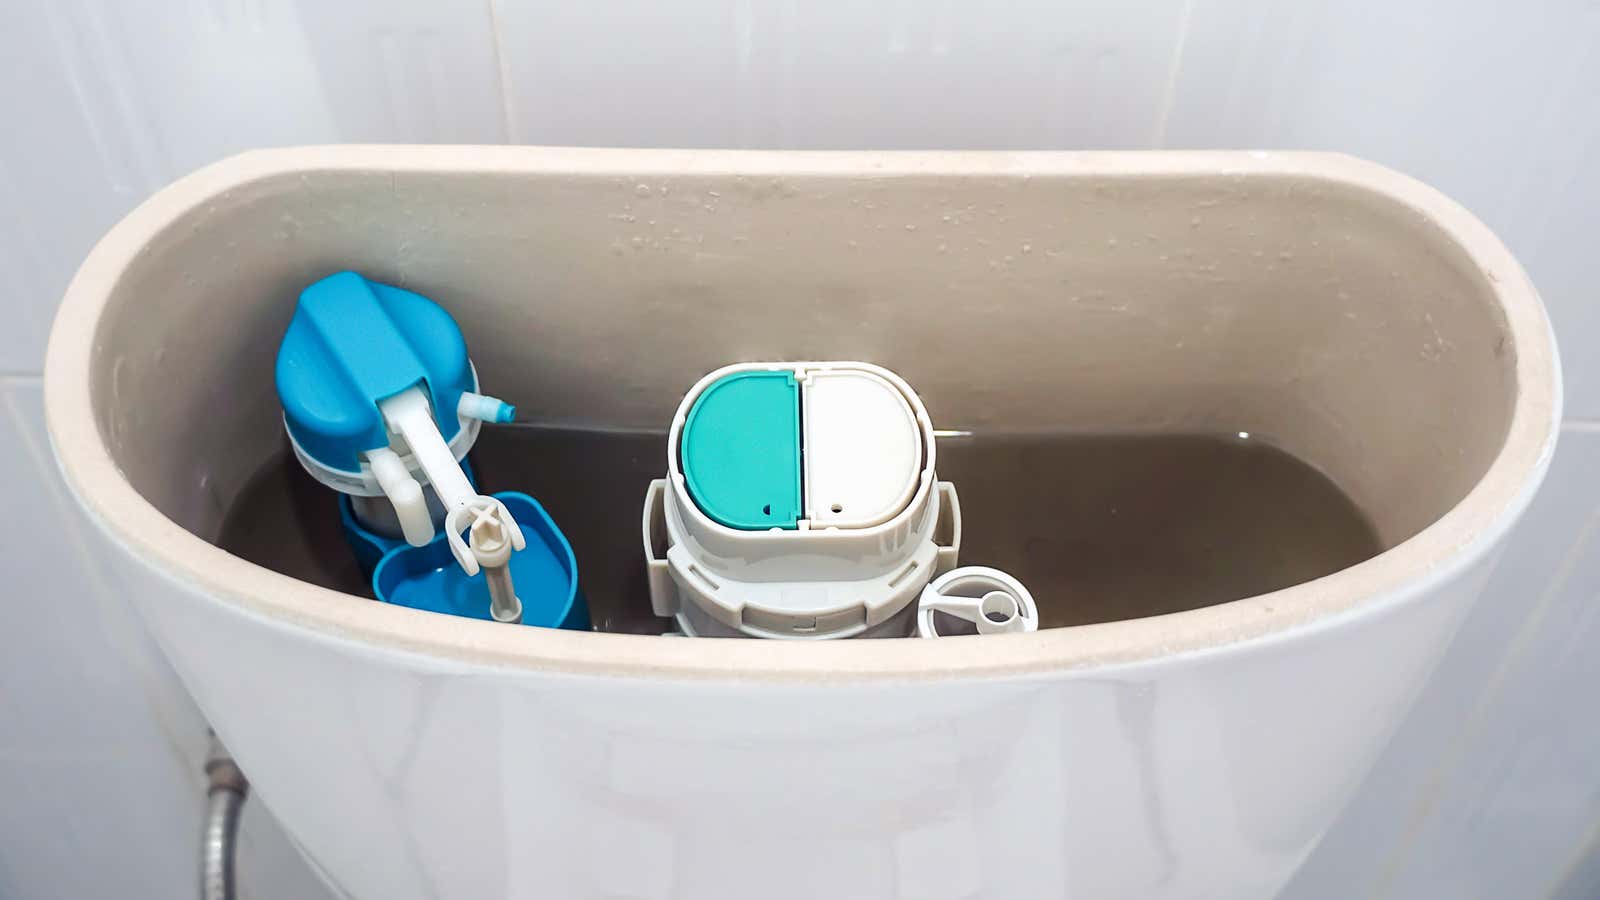
Check your toilet’s fill tube
For a low power flush, the first thing to check is your fill tube. There’s a tube that protrudes from the base of the tank upwards and drains into the bowl and keeps the toilet tank from overflowing. The fill tube is a smaller flexible piece of tubing that should be positioned so it shoots down into the overflow tube. If this piece of tubing comes loose or comes out of the overflow tube, it won’t squirt water into the overflow tube to refill the bowl after you flush. This will cause a weak flush. Most of the time, you can just bend the tube back into place, but you can also get a replacement one if yours is broken or missing. These will also sometimes come with a clip to keep them from coming loose.

Check the float
If your fill tube looks okay, check the float next to make sure your tank is filling enough. If the float is adjusted to be too high, it can cause your toilet to run. The float is attached to a pipe and also to the flap at the bottom of the tank that opens when you flush the toilet. Its height is adjustable by using the rod and sliding clip attached to the upper part of it. The height of the float should be enough that the tank flushes the bowl with water when you flush the toilet, but not so high that it allows water to run down the overflow tube. Adjust the height of the float by sliding the clip up or down the rod until the tank fills with just enough water to flush the bowl with a strong flush.
G/O Media may get a commission
Up to 80% off
Wayfair Early Black Friday

Shop for yourself.
Wayfair’s Early Black Friday is a sitewide sale, but the real magic is in the home upgrades: appliances big and small that are total life-changers.
Check the chain
Next, check the chair to make sure the flapper at the bottom of the tank is opening enough to allow enough water into the bowl for a strong flush. If you’re getting a weak flush, shortening the chain by a link or two will allow the flap to open a bit wider when you pull the handle. Use your wire cutters to undo the top of the chain from the lever on the inside of the toilet tank and then hold the chain to the desired height to test the flapper valve. Once you get a strong flush, clip the chain and reattach it to the lever using the pliers to close the link at the top.
Replace the flapper
If the flapper isn’t closing all the way, your toilet will run because it will constantly be flushing very slowly. This can also cause a weak flush because the tank may never fill all the way. You can get a replacement flapper if your old one is worn out. Before removing the old flapper, you’ll need to turn off the water to the toilet, usually either from outside the house or from the basement shutoff. Then, you can empty the tank by flushing the toilet. Not all toilets have the same exact flapper configuration, so getting the right part will be easier if you know the make and model of your toilet. If not, you can take a picture of the flapper or take the old flapper with you to the hardware store.
There will be either one or two knuckles that the flapper attaches to at one edge where it hinges open. Slide the flapper off of the hinge or hinges and detach the chain from the top of it by unclipping. To attach the new flapper, the knuckles should slide onto their counterparts at the base of the overflow tube, and then you can clip the chain to the top. Then, make sure the flapper is closed and turn the water back on to test it.


.jpg)


